Powershell Scripting for Azure Upload Folder to Azure Webapp
Migrating information from an existing repository to Azure Blob and keeping data in sync in hybrid deployments can both be pregnant hurdles in many organizations' deject journeys. At that place are several Azure-native and third-party tools and services to assistance drift data to Azure, the nearly pop ones being AzCopy, Azure Import/Consign, Azure Powershell, and Azure Information Box. How can you lot know which is the right choice for your Azure migration? Selecting the right tools is dependent on several factors, including timelines for migration, information size, network bandwidth availability, online/offline migration requirements, and more. This blog will share and explore some of these Azure migration tools and the simple steps on how to easily drift files to Azure Hulk storage, all of which can be enhanced with the help of NetApp Cloud Volumes ONTAP's avant-garde data management capabilities for data migration, performance, and protection in Azure Blob storage. Click alee for more on: With data migration and mobility beingness critical components of cloud adoption, Microsoft offers multiple native tools and services to support customers with these processes. Allow'south explore some of these tools in particular. AzCopy is a command-line utility used to transfer information to and from Azure storage. It is a lightweight tool that can be installed on your Windows, Linux, or Mac machines to initiate the data transfer to Azure. AzCopy tin be used in a number of scenarios, for transferring data from on-bounds to Azure Blob and Azure Files or from Amazon S3 to Azure storage. The tool can besides be used for data re-create to or from Azure Stack as well. Click to learn How to Upload Information to Azure Using AzCopy Azure PowerShell is another command line option for transferring data from on-premises to Azure Blob storage. The Azure PowerShell command Ready-AzStorageBlobContent can be used to re-create data to Azure blob storage. Click ahead for Azure PowerShell and How to Use It Azure Import/Export is a physical transfer method used in large data transfer scenarios where the data needs to exist imported to or exported from Azure Hulk storage or Azure Files In add-on to large scale data transfers, this solution tin can too be used for utilise cases like content distribution and data backup/restore. Data is shipped to Azure information centers in customer-supplied SSDs or HDDs. Azure Data Box uses a proprietary Information Box storage device provided past Microsoft to transfer data into and out of Azure data centers. The service is recommended in scenarios where the data size is in a higher place 40 TB and in that location is limited bandwidth to transfer data over the network. The most popular use cases are i-time majority migration of information, initial data transfers to Azure followed by incremental transfers over the network, as well as for periodic upload of bulk data. AzCopy is bachelor for Windows, Linux, and MacOS systems. There is no installation involved as AzCopy runs as an executable file. The zip file for Windows and Linux needs to be downloaded and extracted to run the tool. For Linux, the tar file has to exist downloaded and decompressed before running the commands. The AzCopy tool can exist authorized to access Azure Hulk storage either using Azure Ad or a SAS token. While using Azure AD hallmark, customers can choose to cosign with a user account before initiating the data copy. While using automation scripts, Azure AD authentication tin can exist achieved using a service chief or managed identity. In this walkthrough of AzCopy we will be using hallmark through an Azure Advert user account. The business relationship should be assigned either the storage blob data contributor or the Storage Blob Information Owner role in the storage container where the data is to be copied, as well equally in the storage business relationship, resource grouping, and subscription to exist used. 1. Browse to the folder where AzCopy is downloaded and run the following control to login: Y'all will at present see details near how to log in to https://microsoft.com/devicelogin. Follow the instructions in the output and use the lawmaking provided to authenticate. 2. On the login folio, enter your Azure credentials with access to the storage and click on "Next." 3. Dorsum in the control line, you will receive a "login succeeded" message. Update the <Azure storage account name> placeholder with name of the storage account in Azure and <container> with the proper name of the container you want to create. Beneath, you can come across a sample control: Update the <Local of file in local disk> and <Azure storage account name> placeholders in the above command to reverberate values of your environment, and <container> with the name of the storage container you created in step 4. Sample command given below: Note: In the above example folder1 in the to a higher place command is the container that was created in step 4. Upon successful completion of the command, the job condition will be shown as Completed. Update the <Location of folder in local disk>, <Azure storage account name>, and <container> placeholders in the above command to reflect values of your environment. Sample command given below: Your source binder content volition appear as below: Sample command given below: Azure PowerShell cmdlets tin can exist used to manage Azure resources from PowerShell control and scripts. In improver to AzCopy, Powershell tin too be used to upload files from a local folder to Azure storage. The Azure PowerShell command Set-AzStorageBlobContent is used for the aforementioned purpose. In this section we volition look into the commands that can be used to upload files to Azure blob storage using PowerShell from a Windows motorcar. 1. Install the latest version of Azure PowerShell for all users on the system in a PowerShell session opened with administrator rights using the post-obit control: Select "Yeah" when prompted for permissions to install packages. ii. Use the post-obit command and sign-in to your Azure subscription when prompted: Update the place holders <resource grouping proper noun> and <storage account name> with values specific to your environment, equally in the sample control given below: $storcontext=$uploadstorage.Context Replace the placeholders <storage container name> and <Location of file in local disk> with values specific to your environment. Sample given below: Once the file is uploaded successfully, you will get a bulletin like to what you can encounter in the screenshot below: Sample control given below: We have discussed how data migration to Azure can be easily achieved using AzCopy and Azure PowerShell commands. Customers can likewise leverage NetApp Cloud Volumes ONTAP for data migration to the cloud through trusted NetApp replication and cloning technology. Cloud Volumes ONTAP delivers a hybrid data management solution, spanning on-premises likewise equally multiple cloud environments. Deject Volumes ONTAP is distinguished past the value information technology provides to its customers through high availability, data protection, and storage efficiency features such as deduplication, pinch and thin provisioning. Cloud Volumes ONTAP volumes can be accessed past virtual machines in Azure over SMB/NFS protocols and helps in achieving unparalleled storage economic system through these features. Every bit the storage is being used more than efficiently, Azure storage cost is as well reduced considerably. NetApp Snapshot™ technology along with SnapMirror® data replication tin can ease up the information migration from on-premises environments to the cloud. While SnapShot technology can be used to take Point-in-fourth dimension backup copies of data from on-premises NetApp storage, SnapMirror information replications helps to replicate them to Cloud Volumes ONTAP volumes in Azure. The service can also be used to keep data betwixt on-premises and cloud environments in sync for DR purposes. NetApp FlexClone® data cloning technology helps in creating storage efficient writable clones of on-premises volumes that can be integrated into CI/CD processes to deploy test/dev environments in the cloud. This enhances data portability from on-premises to cloud and also within the cloud, which can all be managed from a unified management pain. Thus, Cloud Volumes ONTAP helps organizations achieve agility and faster time to market place for their applications. Another NetApp data migration service is Cloud Sync, which can speedily and efficiently drift data from whatever repository to object-based storage in the cloud, whether it's from an on-prem system or between clouds. Customers tin can choose from native tools like AzCopy and Azure PowerShell to upload files to Azure Hulk Storage. They can also leverage Deject Volumes ONTAP for advanced data management and migration capabilities using features like SnapMirror replication, NetApp Snapshots and FlexClone.
Tools to Upload Data to Azure Blob Storage
How to Upload Files to Azure Hulk Storage Using AzCopy
azcopy login 
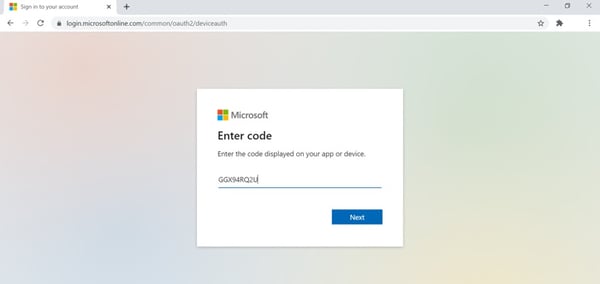

azcopy make "https://<azure storage account proper noun>.hulk.core.windows.net/<container>" azcopy make "https://teststor1110.blob.cadre.windows.net/folder1" 
azcopy copy <Location of file in local disk> "https://<azure storage account proper name>.cadre.windows.internet/<container>/" azcopy copy 'C:\azcopy\Testcopy\folder1\file1.txt' 'https://teststor1110.blob.core.windows.cyberspace/folder1' 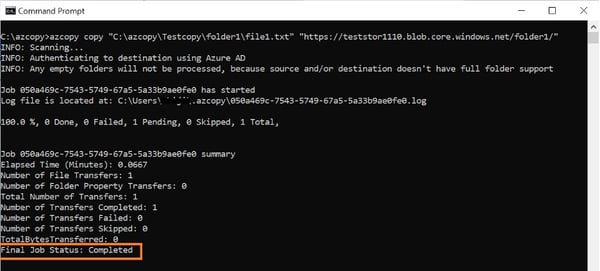
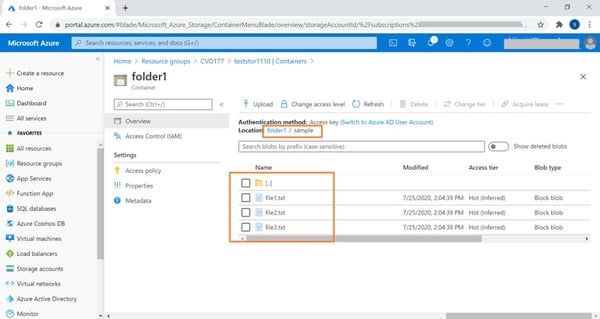
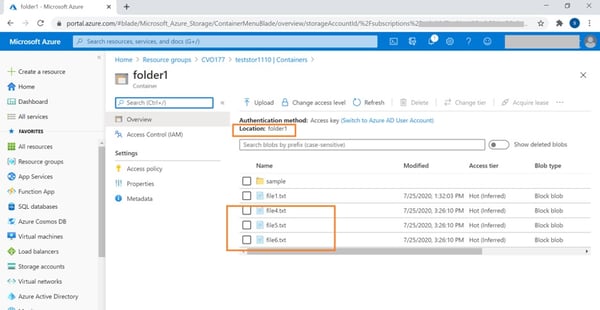
azcopy copy "<Location of folder in local disk>" 'https://<azure storage account name>.blob.core.windows.net/<container>' --recursive azcopy copy "C:\azcopy\Testcopy\sample" "https://teststor1110.blob.core.windows.cyberspace/folder1" --recursive 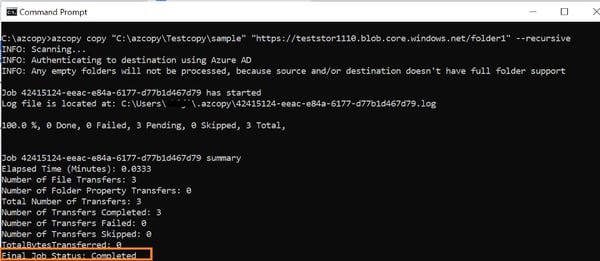
azcopy copy "<Location of folder in local deejay>/*" 'https://<azure storage business relationship proper name>.blob.cadre.windows.net/<container>' azcopy re-create "C:\azcopy\Testcopy\folder2\*" "https://teststor1110.hulk.core.windows.net/folder1" 
What Is Azure PowerShell and How to Employ It
File Transfers to Azure Blob Storage Using Azure PowerShell
Install-Module -Proper name Az -AllowClobber -Scope AllUsers 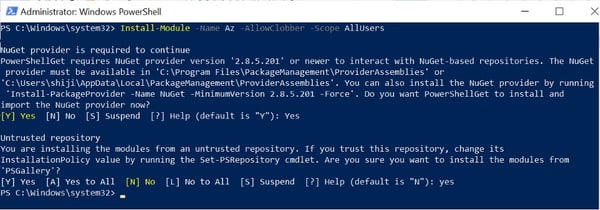
Connect-AzAccount 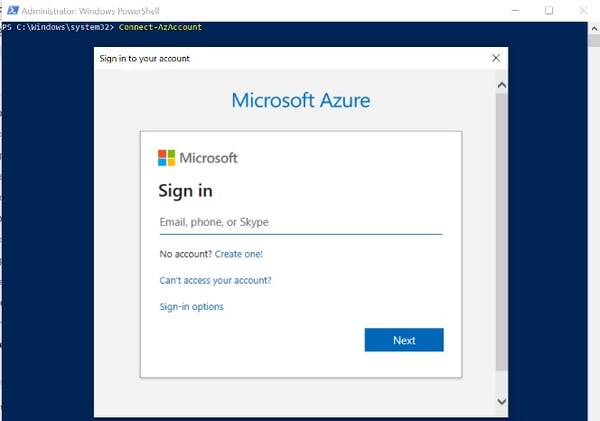
$uploadstorage=Get-AzStorageAccount -ResourceGroupName <resource group proper noun> -Name <storage account name>
$storcontext=$uploadstorage.Context$uploadstorage=Get-AzStorageAccount -ResourceGroupName cvo177 -Name teststor1110 
Ready-AzStorageBlobContent -Container "<storage container name>" -File "<Location of file in local disk>" -Context $storcontext Set-AzStorageBlobContent -Container "folder2" -File "C:\azcopy\Testcopy\folder2\file1.txt" -Context $storcontext 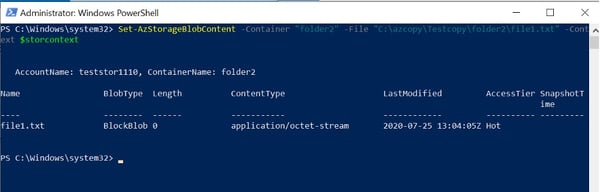
Go-ChildItem -File -Recurse | Set-AzStorageBlobContent -Container "<storage container name>" -Context $storcontext Get-ChildItem -File -Recurse | Ready-AzStorageBlobContent -Container "folder2" -Context $storcontext 

NetApp Cloud Volumes ONTAP: Accelerate Cloud Information Migration
Conclusion

Source: https://cloud.netapp.com/blog/azure-cvo-blg-how-to-upload-files-to-azure-blob-storage
0 Response to "Powershell Scripting for Azure Upload Folder to Azure Webapp"
Post a Comment